
Hi All... I have a fun new exciting high- making birthday cakes!! Thanks to my friends Leslie and Sus, who trusted me enough to ask me to bake their daughters' birthday cakes! I had made a castle cake (made with 6 cakes) for my lil girl's birthday last year! I got very positive reviews after that but I wasn't bold enough to take any orders for the cake. But my friend Leslie thought that I should be able to make one for her lil girl who was turning 5 this month.

The first birthday girl wanted a princess with pink gown. I decided to do a yellow cake with strawberry preserves for the doll and a black forest cake with fondant (Wilton) covering to resemble a wrapped present, with the doll standing on top. The present cake was covered with a pastel pink fondant with bows, crullers and ribbon made out of white fondant. And thus my first ever doll and present cake was born! It turned out really well, and the guests were amazed and were kind enough to appreciate me!

The inspiration for the ruffled layers in the front of the doll came from a video of a cake on youtube and I searched for tutorials. Finally when I figured it out, I realised that it was a relatively easy and quick to master technique and yet gave breathtakingly beautiful and professional looking results!


The inspiration for the ruffled layers in the front of the doll came from a video of a cake on youtube and I searched for tutorials. Finally when I figured it out, I realised that it was a relatively easy and quick to master technique and yet gave breathtakingly beautiful and professional looking results!

For the crullers (fondant springs): Roll the fondant thin and make very thin long ribbons with a kinife. Drape the ribbon around the handle of a wooden spatula and allow to dry slightly. Slide the crullers off the handle gently and allow to harden completely.

I grew confident and I decided that I could accept a second cake order within a couple of weeks! Sus really liked pictures of the first cake and wanted a doll cake for her daughter too! But I changed the bottom of the second cake by covering it with buttercream (Wilton decorator's icing)icing with pink shells on the border and two toned roses.

The second doll was done pretty much similar to the first one except that the gown was of a slightly diferent pattern. I also tried using pearl dust (pink) on the gown and thats my new favorite cake decorating accessory!! The pearl dust gave such a beautiful sheen to the dress, I loved it! Its pretty easy to use - just mix with some vanilla extract and paint on! Pearls coated with shimmer dust also adorned the gown.

The second doll was done pretty much similar to the first one except that the gown was of a slightly diferent pattern. I also tried using pearl dust (pink) on the gown and thats my new favorite cake decorating accessory!! The pearl dust gave such a beautiful sheen to the dress, I loved it! Its pretty easy to use - just mix with some vanilla extract and paint on! Pearls coated with shimmer dust also adorned the gown.

For the irrgeular green stringy leaves, pipe green tinted buttercream through a small round tip and allow to drop naturally on the cake. For two toned roses, apply gel coloring to the inside of the piping bag (on the narrow petal tip side of the bag). Pipe buttercream roses with icing tinted to a color lighter than the gel applied to the inside of the bag. I have sprinkled pink decoraring sugar on the cake. Also, put tiny drops of piping gel on the roses to resemble water drops.

Since I didnt take any pictures of how to make the ruffles during my first try, I took some this time. Hopefully someone else will find it useful! Please follow the basics of working with fondant - dust the work surface with confectioner's sugar, keeping the unused fondant covered. I did all my fondant work on a silpat mat.

Make crinkle cut outs from fondant. Cut the center of the cut outs using a smaller plain round cutter.


Stick the ruffle to a crumb coated doll figurine. If attaching to a fondant covered surface, use little water to stick the ruffle to the fondant. I attached three of such ruffles to make the lowest layer of ruffle. Attach the second layer of ruffles overlapping the first (bottom). Repeat to cover the entire front of the doll. I did the next couple of layers with one ruffle each and then towards the top of the doll, one ruffle ring can be cut into two and stretched to make the top ruffle layers. Drape another layer of rolled fondant over the ruffles so as to cover the ends of the ruffles and make the gown.Decorate/punch designs on the drape before applying onto the cake.


Take a tooth pick and press at the petal part of the cut out and roll it back and forth to thin out the area. Repeat through all the petals of the cut outs. Cut the ruffle ring along one petal and stretch to linearize.

Stick the ruffle to a crumb coated doll figurine. If attaching to a fondant covered surface, use little water to stick the ruffle to the fondant. I attached three of such ruffles to make the lowest layer of ruffle. Attach the second layer of ruffles overlapping the first (bottom). Repeat to cover the entire front of the doll. I did the next couple of layers with one ruffle each and then towards the top of the doll, one ruffle ring can be cut into two and stretched to make the top ruffle layers. Drape another layer of rolled fondant over the ruffles so as to cover the ends of the ruffles and make the gown.Decorate/punch designs on the drape before applying onto the cake.
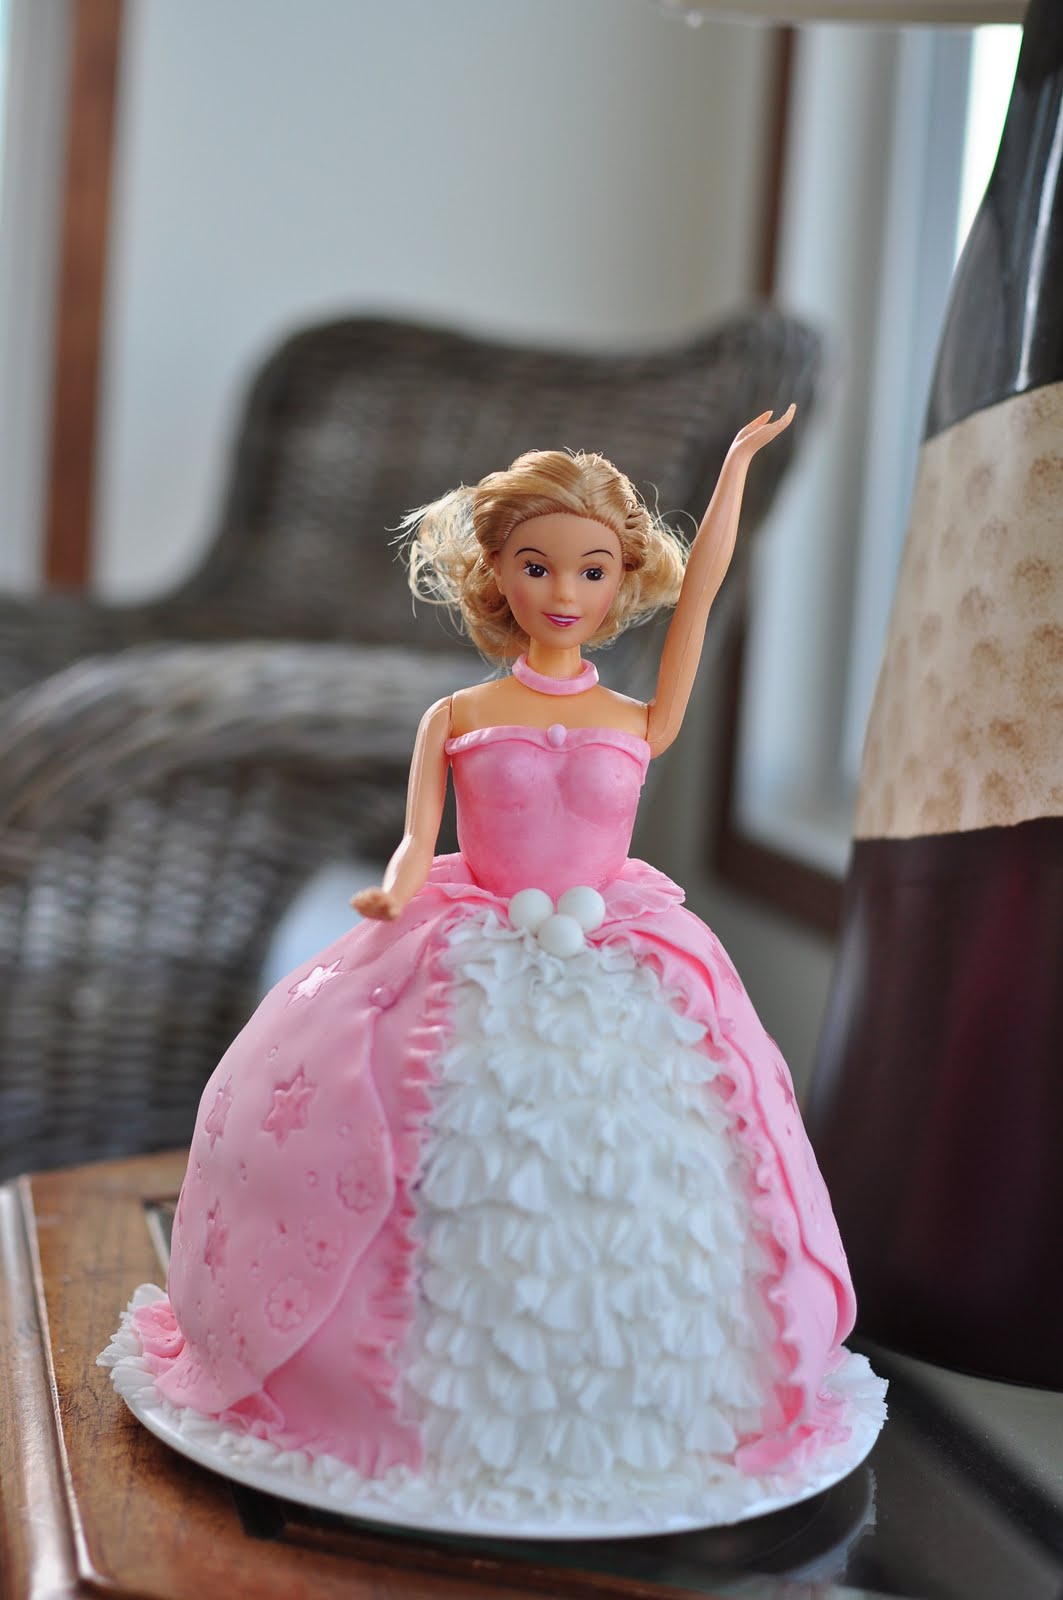
I hand painted each star on the draped gown with the pearl dust, and also the ruffles. I am extremely happy with the results considering this is only my second doll cake!
I know I haven't covered everything in this post. So feel free to ask any questions that you might have, I would be happy to respond. Please do let me know your thoughts and suggestions on how I did!
Once again I am toasting to my new hobby! I just hope I would get enough time to be able to continue with it.... Cheers!!!
7 comments:
Amazing. Great going J!
That cake looks as if baked and decorated by a professional baker... Looks so beautiful... The bday girl would have loved it... Kudos to ur newly found hobby...
Loved both the creations
Hi... How r u?.... Sounds to be a awesome one.... Looking great...
Nice... the second one came out even better.. loved the pearl dusting.. Keep going
:) Jeena... This is Deepa Sebas @MN. Read your post.... I's admiring your doll cake & curious about the doll. What is the size of the cake? Is that a round cake cut and shaped into a gown? Hope to see the next post before the fondants covering. I'm expecting a step by step tutorial. ;)
Once again... Hats off to you...
can u share buttercream recipe pls
Post a Comment