Tempting the taste buds - Indian and International cuisine for people who love food and cooking!!
February 5, 2012
Buche de Noel (Yule-log) recipe and a giveaway!!
Hi All!!! Hope all my readers, friends and followers are keeping happy and healthy! After a very long and regretful break from blogging, I am back with a wonderful Yule-log creation from last year's Christmas meal. The break from blogging was not planned at all, it just got long as a combined result of a busy work schedule and no free time! But I am glad that I am back and I am excited to share this recipe and images with you all.
Also, I am excited to announce that in a week, my blog will turn 4 years old! Happy Birthday dear blog!! If you love my blog and is a regular reader, please leave me a message on this post, and I will be awarding two lucky winners a modest $15 gift card of your choice from Target/Home Goods/Michaels/Amazon as part of my blog's 4th Birthday celebrations. I will choose the winners on Feb 12th and the winners will be chosen in a random lucky draw. Please leave your email id as part of your comment.
This recipe for the assembled yule-log was compiled from two different websites. The raspberry chocolate sponge cake recipe was taken from joyofbaking, but the actual recipe is by Rose Levy Beranbaum's 'Cake Bible'. The website also had a recipe for yule-log, but I wanted to make a dressed up yule-log, with the textured bark look, completed with mushrooms and beautiful holly leaves and berries.
I found what I was looking for in this post. I loved how textured the surface looked, and also since it had directions of making marzipan mushrooms, rather than meringue mushrooms, I was ecstatic!!
Let me tell you that it makes for a very light and airy dessert!!! The actual sponge cake roll was very light, and not dense at all. The cake was the "melt-in-your-mouth" kind and using raspberry whipped cream as filling finished it off perfectly. It was not an extremely sweet dessert either. In the end, it left you feeling good, and satisfied. The chocolate ganache bark would give a little bit of sweetness to the log, but since I used bittersweet dark chocolate, it didn't add a lot of sweetness! The marzipan mushrooms added a fun look to the log, and the holly leaves and berries made from fondant, added a splash of color to the ultimate christmas dessert!!! It definitely was fun and easy to make this dessert and I enjoyed every single minute of it!
Try this yule log and you will be sure to impress your guests. I baked and filled the sponge cake the day before the party. I made the ganache on the day of the party, let it cool slightly in the fridge (keep a watchful eye, if its too think, it will be hard to spread). I spread the slightly thickened ganache on the cool log, and as it set a little bit, marked the surfaces (drag the tines of the fork along the length of the log) with a fork, to create the texture. The holly leaves were made from fondant, cut out with a petal cutter, and then the edges were cut using a piping tip to make it shaped like holly leaves. The berries were made out of fondant as well. Assemble the log and sprinkle some confectioner's sugar using a sieve to resemble freshly fallen snow to complete the look.
Hope you all enjoyed the post and the tips! Don't forget to leave a comment, to be one of the two lucky winners of my blog's 4th birthday giveaway!! I hope to keep writing and to receive the support of all my readers!!
Enjoy the superbowl, and have a great week ahead!
July 27, 2011
Strawberry Fraisiers for DB Challenge!

Now, coming back to the challenge, let me start by saying that this was one of the most fun challenges ever! Thanks, Jana! It was enjoyable every step of the way, with simple ingredients and techniques, but still with an oppurtunity for creativity and skills... Eventhough, I thought that I had made mistakes with the pastry cream and the cake, in the end it turned out beautiful, silky smooth, cool and refreshing. The entire cake was just amazing, not so sweet, not heavy and overwhelming, but really soothing, cool and really summer-y!! I am really happy with the outcome of my challenge, and would recommend this to everyone- it makes a great summer cake!
My cake did sink out of the oven, but it was still soft and airy, so I just leveled off the top and used as directed. My pastry cream did thicken a bit more than I would have liked, so I added more milk to thin it out. So I used gelatin accordingly to account for the extra cream. Like others mentioned, I think the hardest part was covering the springform ring with clingwrap! The wait after assembly was another agonizing step without knowing whether the cake assembly was perfect and whether the cream would hold up.
Needless to say, everything went well, and the cake held up beautifully. Even the slice was beautiful and held up without getting squished. In short, my family enjoyed it immensely and so did my friend. I also saved a slice for my coworker (Allison, thats you!) who enjoyed every bit of it, I was thrilled with her reaction! Anyways, its great to be back with a great challenge completed successfully..
Basic Chiffon Cake:
for gluten free and vegan options see the links at the end
1 cup + 2 tablespoons (270 ml) (5½ oz/155 gm) all-purpose flour
1 teaspoon (5 ml) (4 gm) baking powder
3/4 cups (180 ml) (6 oz /170 gm) sugar
1/2 teaspoon (2½ ml) (1½ gm) salt, preferably kosher
1/4 cup (2 fl oz/60 ml) vegetable oil
3 large egg yolks
⅓ cup + 1 tablespoon (3.17 fl oz/95 ml) water
1 teaspoon (5 ml) pure vanilla extract
3/4 teaspoon (3¾ ml) (3 gm) lemon zest, grated
5 large egg whites
¼ teaspoon (1¼ ml) (1 gm) cream of tartar
1. Preheat the oven to moderate 325°F (160°C/gas mark 3).
2. Line the bottom of an 8-inch (20 cm) spring form pan with parchment paper. Do not grease the sides of the pan.
3. In a large mixing bowl, stir together the flour and baking powder. Add in all but 3 tablespoons (45 ml.) of sugar, and all of the salt. Stir to combine.
4. In a small bowl combine the oil, egg yolks, water, vanilla and lemon zest. Whisk thoroughly.
5. Combine with the dry ingredients and mix thoroughly for about one minute, or until very smooth.
6. Put the egg whites into a stand mixer, and beat on medium speed using a whisk attachment on a medium speed, until frothy. Add cream of tartar and beat on a medium speed until the whites hold soft peaks. Slowly add the remaining sugar and beat on a medium-high speed until the whites hold firm and form shiny peaks.
7. Using a grease free rubber spatula, scoop about ⅓ of the whites into the yolk mixture and fold in gently. Gently fold in the remaining whites just until combined.
8. Pour the batter into the prepared pan. Bake for 45 to 55 minutes or until toothpick inserted into the center comes out clean.
9. Removed the cake from the oven and allow to cool in the pan on a wire rack.
10. To unmold, run a knife around the sides to loosen the cake from the pan and remove the spring form sides. Invert the cake and peel off the parchment paper. Refrigerate for up to four days.
Variations to the Basic Chiffon Cake:
Lemon Chiffon Cake
Ingredient Alterations:
Reduce water to 1/4 cup (60 ml)
Add 1/8 cup (30 ml) lemon juice
Increase lemon zest to 1½ teaspoon (7½ ml) (5 gm)
Remove the vanilla from the recipe
Direction Alterations:
Follow the directions, same as above, adding the lemon juice and zest to the oil, egg yolks and water in step 4.
Orange Chiffon Cake
Ingredient Alterations:
Replace the full amount of water with orange juice
Replace lemon zest with the zest of one orange
Remove the vanilla from the recipe
Direction Alterations:
Follow the directions, same as above, adding the orange juice and zest to the oil, and egg yolks in step 4.

Coconut Chiffon Cake
Ingredient Alterations:
Add ¼ teaspoon (1¼ ml) (1 gm) freshly ground nutmeg
Reduce oil to 1/8 cup (1 fl oz/30ml)
Reduce water to 1/8 cup (1 fl oz/30ml)
Add 1/3 cup (2 ⅔ fl oz/80 ml) unsweetened coconut milk
Remove the vanilla from the recipe
Direction Alterations:
Follow the directions, same as above, adding the nutmeg to the flour mixture in step 3, and the coconut
milk to the oil, water and egg yolks in step 4.
Chocolate Chiffon Cake
Ingredient Alterations:
Reduce all-purpose flour to ¾ cup + 1 tablespoon (195 ml) (4 oz/110 g)
Add 1/4 cup (60 ml) (3/4 oz/20 g) cocoa powder
Direction Alterations:
Follow the directions, same as above, adding the cocoa to the flour mixture in step 3.

Pastry Cream Filling:
Gluten Free! Vegans see the links at the end!
Ingredients:
1 cup (8 fl oz/250 ml) whole milk
1/2 teaspoon (2½ ml) pure vanilla extract
1/8 teaspoon (1/2 ml) (¼ gm) salt, preferably kosher
2 tablespoons (30 ml) (10 gm)cornstarch
1/4 cup (60 ml) (2 oz/55 gm) sugar
1 large egg
2 tablespoons (30 ml) (1 oz/30 gm) unsalted butter
3/4 teaspoon (3¾ ml) (4 gm) gelatin
1/2 tablespoon (7½ ml) water
1 cup (8 fl oz/250 ml) heavy cream
Directions:
1. Pour the milk, vanilla, and salt into a heavy sauce pan. Place over medium-high heat and scald, bringing it to a near boiling point. Stir occasionally.
2. Meanwhile, in a stand mixer add the cornstarch and sugar. Whisk to combine.
3. Add the eggs to the sugar and cornstarch and whisk until smooth.
4. When the milk is ready, gently and slowly while the stand mixer is whisking, pour the heated milk down the side of the bowl into the egg mixture.
5. Pour the mixture back into the warm pot and continue to cook over a medium heat until the custard is thick, just about to boil and coats the back of a spoon.
6. Remove from heat and pass through a fine mesh sieve into a large mixing bowl. Allow to cool for ten minutes stirring occasionally.
7. Cut the butter into four pieces and whisk into the pastry cream a piece at a time until smooth.
8. Cover the cream with plastic wrap, pressing the plastic wrap onto the top of the cream to prevent a skin from forming. Chill in the refrigerator for up to five days.
9. In a small dish, sprinkle the gelatin over the water and let stand for a few minutes to soften.
10. Put two inches (55 mm) of water into a small sauce pan and bring to a simmer over a medium heat.
11. Measure 1/4 cup (2 oz/60 ml) of the chilled pastry cream into a small stainless steel bowl that will sit across the sauce pan with the simmering water, without touching the water.
12. Heat the cream until it is 120 F (48.8 C). Add the gelatin and whisk until smooth. Remove from the water bath, and whisk the remaining cold pastry cream in to incorporate in two batches.
13. In a stand mixer, fitted with the whisk attachment, whip the cream until it holds medium-stiff peaks. Immediately fold the whipped cream into the pastry cream with a rubber spatula.

Simple Syrup:
gluten free and vegan!
You may choose to flavor the syrup. One way is to use flavored sugar (for example:
apple cider sugar, orange sugar, or vanilla sugar) or to stir in 1-2 teaspoons of
flavored extract. You may also infuse with herbs or spices, if desired or add four
tablespoons (60 ml) of fruit juice or liqueur while the syrup is cooling.
Ingredients:
1/3 cup (2⅔ fl oz/80 ml) (2⅔ oz/75 gm) of sugar, flavored or white
1/3 cup (2⅔ fl oz/80 ml) of water
Directions:
1. Combine the water and sugar in a medium saucepan.
2. Bring the mixture to a boil and let the sugar dissolve. Stirring is not
necessary, but will not harm the syrup.
3. Remove the syrup from the heat and cool slightly.
4. Transfer syrup to a lidded container or jar that can be stored in the refrigerator. Simple syrup can be stored for up to one month.
Fraisier Assembly:
Components:
1 baked 8 inch (20 cm) chiffon cake
1 recipe pastry cream filling
⅓ cup (80 ml) simple syrup or flavored syrup
2 lbs (900 g) strawberries
confectioners’ sugar for dusting
½ cup (120 ml) (5 oz/140 gm) almond paste
Directions:
1. Line the sides of a 10-inch (25 cm) spring form pan with plastic wrap. Do not line the bottom of the pan.
2. Cut the cake in half horizontally to form two layers.
3. Fit the bottom layer into the prepared spring form pan. Moisten the layer evenly with the simple syrup. When the cake has absorbed enough syrup to resemble a squishy sponge, you have enough.
4. Hull and slice in half enough strawberries to arrange around the sides of the cake pan. Place the cut side of the strawberry against the sides of the pan, point side up forming a ring.
5. Pipe cream in-between strawberries and a thin layer across the top of the cake.
6. Hull and quarter your remaining strawberries and place them in the middle of the cake. Cover the strawberries and entirely with the all but 1 tbsp. (15 ml) of the pastry cream.
7. Place the second cake layer on top and moisten with the simple syrup.
8. Lightly dust a work surface with confectioners' sugar and roll out the almond paste to a 10-inch (25 cm) round 1/16 inch (1.5 mm) thick. Spread the remaining 1 tablespoon (15 ml) of pastry cream on the top of the cake and cover with the round of almond paste.
9. Cover with plastic wrap and refrigerate for at least 4 hours.
10. To serve release the sides of the spring form pan and peel away the plastic wrap.
11. Serve immediately or store in the refrigerator for up to 3 days.
March 21, 2011
Exciting new hobby!!
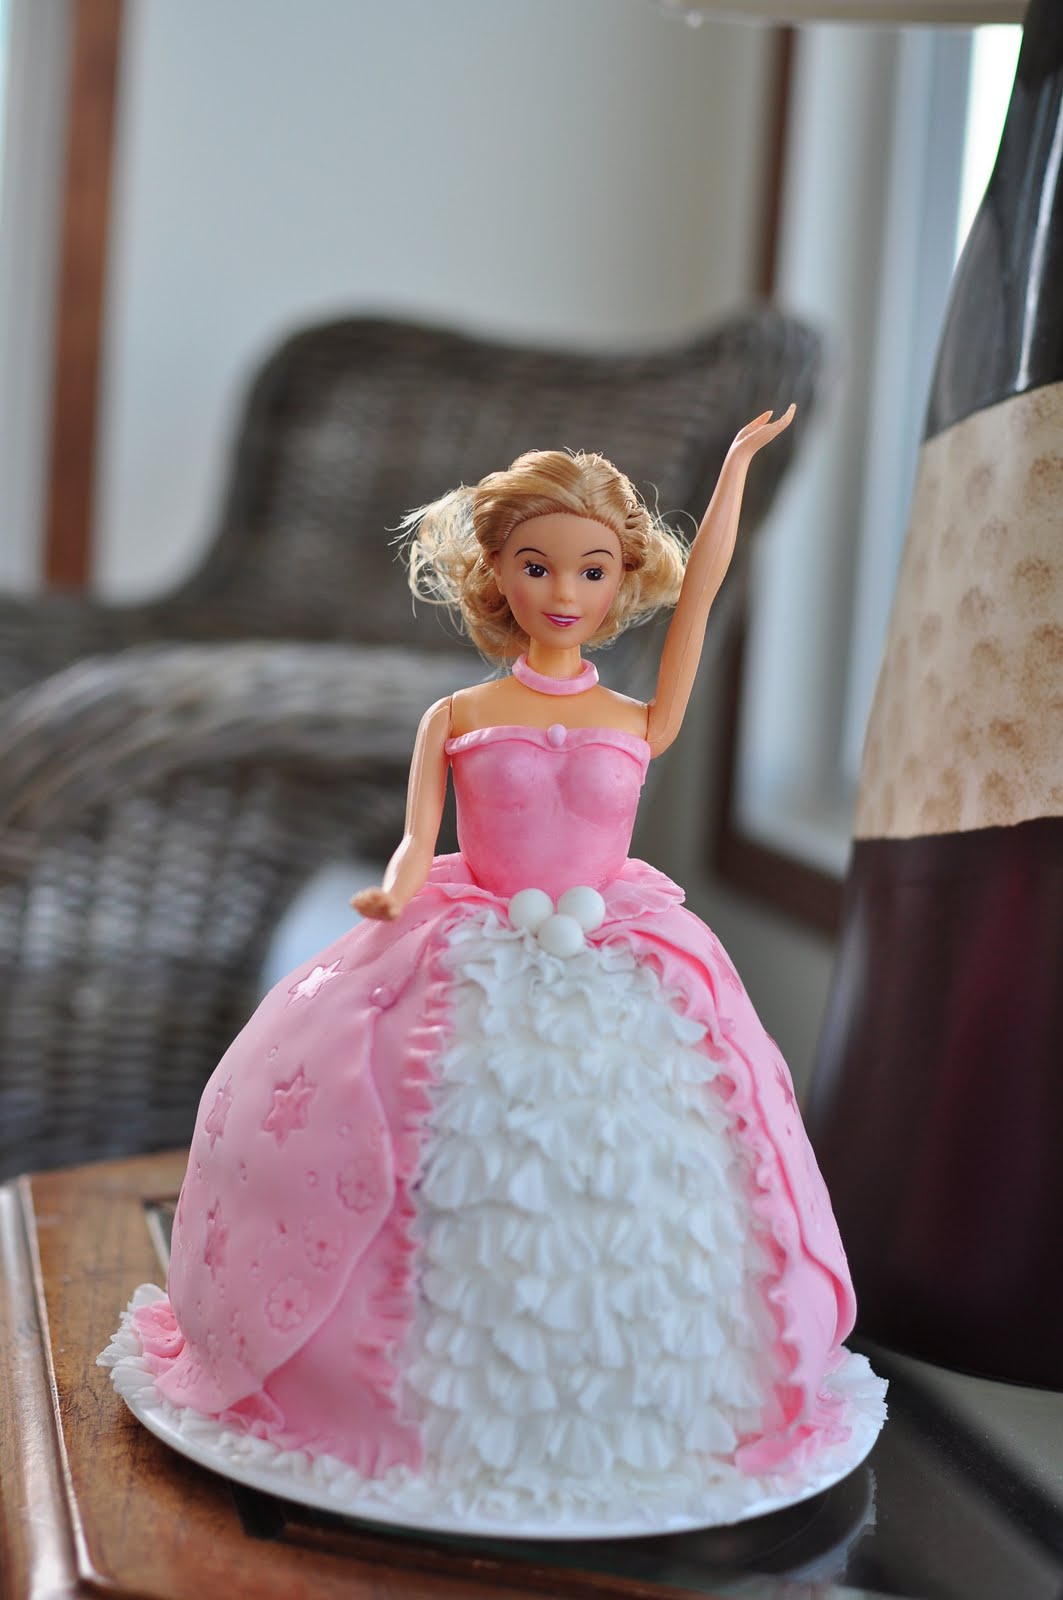
The inspiration for the ruffled layers in the front of the doll came from a video of a cake on youtube and I searched for tutorials. Finally when I figured it out, I realised that it was a relatively easy and quick to master technique and yet gave breathtakingly beautiful and professional looking results!

The second doll was done pretty much similar to the first one except that the gown was of a slightly diferent pattern. I also tried using pearl dust (pink) on the gown and thats my new favorite cake decorating accessory!! The pearl dust gave such a beautiful sheen to the dress, I loved it! Its pretty easy to use - just mix with some vanilla extract and paint on! Pearls coated with shimmer dust also adorned the gown.


Stick the ruffle to a crumb coated doll figurine. If attaching to a fondant covered surface, use little water to stick the ruffle to the fondant. I attached three of such ruffles to make the lowest layer of ruffle. Attach the second layer of ruffles overlapping the first (bottom). Repeat to cover the entire front of the doll. I did the next couple of layers with one ruffle each and then towards the top of the doll, one ruffle ring can be cut into two and stretched to make the top ruffle layers. Drape another layer of rolled fondant over the ruffles so as to cover the ends of the ruffles and make the gown.Decorate/punch designs on the drape before applying onto the cake.
January 27, 2011
Biscuit Joconde Imprime for Daring Bakers- My 25th Challenge!!

The January 2011 Daring Bakers’ challenge was hosted by Astheroshe of the blog accro. She chose to challenge everyone to make a Biscuit Joconde Imprime to wrap around an Entremets dessert.
Here it is! My attempt at the Joconde imprime filled to make an entremet! This challenge was really exciting since this was something I've never done before! The patterns that I came across on the net were amazing and eventhough mine didnt turn out as good as I had hoped, I am still happy with my attempt. The whole process went fine, but what I learned is that if we are making a pattern with chocolate paste and plain cake mix, the chocolate paste has to be really dark to give stunning patterns. I just eyeballed the recipe and so ended up with light chocolate paste, which still gave good patterns. I made swirls, dots and stripes, both with brown and pink tinted paste, but the chocolate striped one turned out the best.
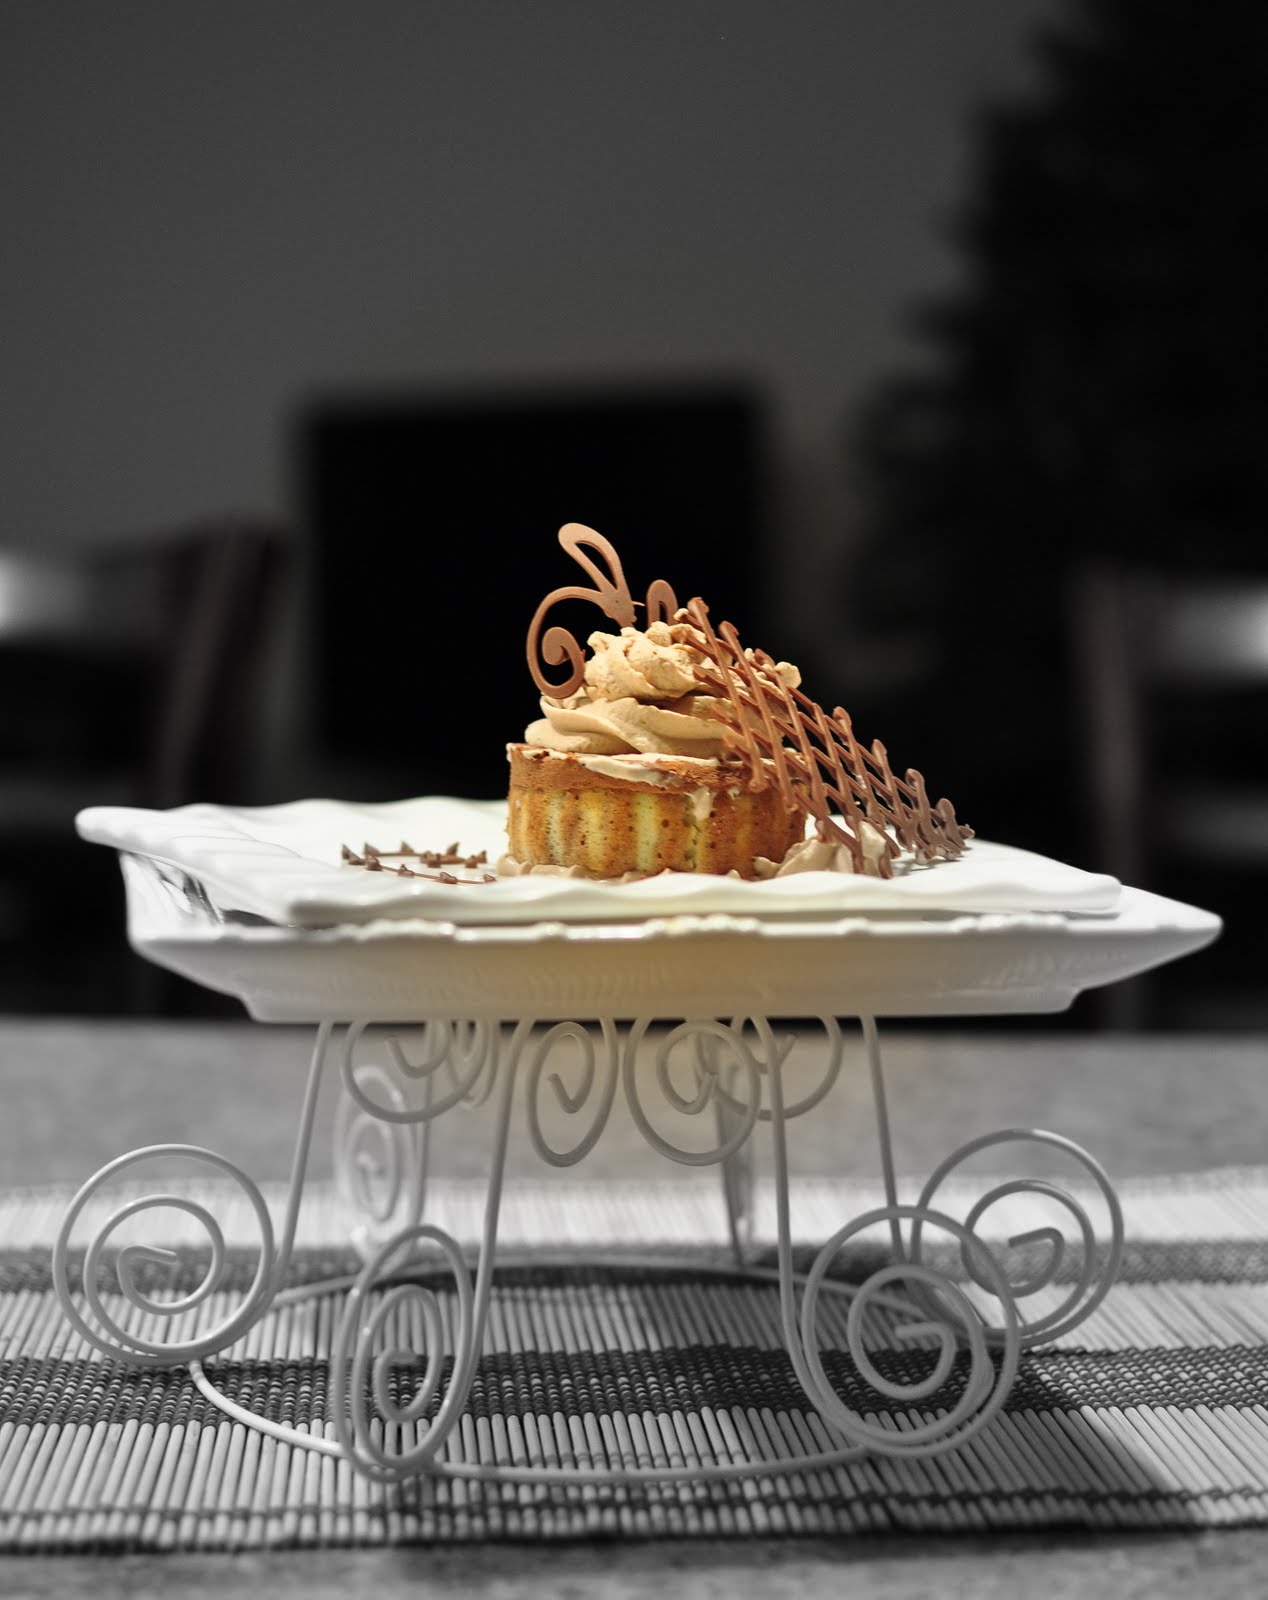
I loved learning the technique and am proud to have completed another daring challenge! :-)I filled the biscuit joconde with chocolate mousse and decorated it with chocolate whipped cream and chocolate art as garnishes!

Joconde Sponge
YIELD: Two ½ size sheet pans or a 13” x 18” (33 x 46 cm) jelly roll pan
Ingredients:
¾ cup/ 180 ml/ 3oz/ 85g almond flour/meal - *You can also use hazelnut flour, just omit the butter
½ cup plus 2 tablespoons/ 150 ml/ 2⅔ oz/ 75g confectioners' (icing) sugar
¼ cup/ 60 ml/ 1 oz/ 25g cake flour *See note below
3 large eggs - about 5⅓ oz/ 150g
3 large egg whites - about 3 oz/ 90g
2½ teaspoons/ 12½ ml/ ⅓ oz/ 10g white granulated sugar or superfine (caster) sugar
2 tablespoons/ 30 ml/ 1oz / 30g unsalted butter, melted
*Note: How to make cake flour: http://www.joythebaker.com/blog/2009/09/how-to-make-cake-flour/
Directions:
- In a clean mixing bowl whip the egg whites and white granulated sugar to firm, glossy peeks. Reserve in a separate clean bowl to use later.
- Sift almond flour, confectioner’s sugar, cake flour. (This can be done into your dirty egg white bowl)
- On medium speed, add the eggs a little at a time. Mix well after each addition. Mix until smooth and light. (If using a stand mixer use blade attachment. If hand held a whisk attachment is fine, or by hand. )
- Fold in one third reserved whipped egg whites to almond mixture to lighten the batter. Fold in remaining whipped egg whites. Do not over mix.
- Fold in melted butter.
- Reserve batter to be used later.
Patterned Joconde-Décor Paste

YIELD: Two ½ size sheet pans or a 13” x 18” (33 x 46 cm) jelly roll pan
Ingredients
14 tablespoons/ 210ml/ 7oz/ 200g unsalted butter, softened
1½ cups plus1½ tablespoons/ 385ml/ 7oz/ 200g Confectioners' (icing) sugar
7 large egg whites - about 7 oz / 200g
1¾ cup/ 420ml/ 7¾ oz/ 220g cake flour
Food coloring gel, paste or liquid
COCOA Décor Paste Variation: Reduce cake flour to 6 oz / 170g. Add 2 oz/ 60 g cocoa powder. Sift the flour and cocoa powder together before adding to creamed mixture.
Directions:
- Cream butter and sugar until light and fluffy (use stand mixer with blade, hand held mixer, or by hand)
- Gradually add egg whites. Beat continuously.
- Fold in sifted flour.
- Tint batter with coloring to desired color, if not making cocoa variation.
Preparing the Joconde- How to make the pattern:
- Spread a thin even layer of décor paste approximately 1/4 inch (5 millimeter) thick onto silicone baking mat with a spatula, or flat knife. Place mat on an upside down baking sheet. The upside down sheet makes spreading easier with no lip from the pan.
- Pattern the décor paste – Here is where you can be creative. Make horizontal /vertical lines (you can use a knife, spatula, cake/pastry comb). Squiggles with your fingers, zig zags, wood grains. Be creative whatever you have at home to make a design can be used. OR use a piping bag. Pipe letters, or polka dots, or a piped design. If you do not have a piping bag. Fill a ziplock bag and snip off corner for a homemade version of one.
- Slide the baking sheet with paste into the freezer. Freeze hard. Approx 15 minutes.
- Remove from freezer. Quickly pour the Joconde batter over the design. Spread evenly to completely cover the pattern of the Décor paste.
- Bake at 475ºF /250ºC until the joconde bounces back when slightly pressed, approx. 15 minutes. You can bake it as is on the upside down pan. Yes, it is a very quick bake, so watch carefully.
- Cool. Do not leave too long, or you will have difficulty removing it from mat.
- Flip cooled cake on to a powdered sugared parchment paper. Remove silpat. Cake should be right side up, and pattern showing! (The powdered sugar helps the cake from sticking when cutting.)
- Start with a large piece of parchment paper laid on a very flat baking sheet. Then a large piece of cling wrap over the parchment paper. Place a spring form pan ring, with the base removed, over the cling wrap and pull the cling wrap tightly up on the outside of the mold. Line the inside of the ring with a curled piece of parchment paper overlapping top edge by ½ inch. CUT the parchment paper to the TOP OF THE MOLD. It will be easier to smooth the top of the cake.
- A biscuit cutter/ cookie cutter- using cling wrap pulled tightly as the base and the cling covering the outside of the mold, placed on a parchment lined very flat baking sheet. Line the inside with a curled piece of parchment paper overlapping.
- Cut PVC pipe from your local hardware store. Very cheap! These can be cut into any height you wish to make a mold. 2 to 3 inches is good. My store will cut them for me, ask an employee at your store. You can get several for matching individual desserts. Cling wrap and parchment line, as outlined above.

Preparing the MOLD for entremets:
You can use any type of mold. I would suggest:

Check out all my previous Daring Baker challenges here. I am proud to have completed my 25th Daring Baker Challenge successfully!
July 27, 2010
Swiss Swirl Icecream Cake for DB Challenge!

I didn't get to go too creative with the icecream flavors. I went with the recipes given kind of "settling" for the vanilla icecream and chocolate icecream as the two flavors (eventhough my longing was to make rose-flavored and pistachio flavored icecreams!!). I used icecream maker to make both icecreams! I really didnt like the taste of the fudge sauce alone, but everything came together in the end. I felt that it tasted just like it was- sweetend water with cocoa! Maybe it would have been better if we had made some chocolate ganache for the filling!
I assembled the cake slices and the vanilla icecream on Sunday. I also made the Chocolate icecream. I was planning to make the fudge sauce and assemble the rest of the cake on the evening before the challenge reveal date. Unfortunately, when I came back home I found that the freezer wasn't closed properly and that the cake/vanilla icecream was soft!!! I still made the fudge sauce, waited a while for it to cool down and keeping my fingers crossed added the slightly warm sauce on top the vanilla icecream! Ofcourse, there is a reason for every instruction in the recipe, the sauce melted the icecream a bit and kind of became gooey. But I just hoped that too much damage wasn't done. I waited for an hour, but the icecream/fudge had still not set, but I added the softened chocolate icecream on top and just hoped that I would still have the three separate layers when I cut into the icecream cake.
I had to wait till evening today so that the cake could harden and I could take pictures once I came back from work. The unmolding was quick, and I decorated the cake with some cherries, shaved chocolate and sugar-frosted cherries on top. My cake slices were not clean - maybe I should have partially frozen the swiss roll before cutting into slices which would have made lesser smearing of cream on the cake. But other than that everything looked good and I was happy with the icecream cake.

VERDICT: Today was the best day for this icecream cake because the weather was unbearably hot in MN and there even was a heat advisory!! The thought of the icecream cake got me through the harsh evening commute! The icecream cake was perfect for this hot day. It was delicious, sweet and cold, everything you would expect from an icecream cake. Maybe its just me, but I wasn't "wow"ed by it though! I felt that the cake was a little bland tasting once it absorbed a bit of moisture or maybe it was because of freeze thawing!? Who knows, maybe it was because my swirl slices almost completely thawed because of the freezer mishap! A delight for sure for the eyes because of its layers, but somehow didn't rise to my expectations. I honestly felt that the individual elements worked better for me separately... We would give a 7.5/10 for this cake..
But one thing is for sure, it was a hit with my daughter! She rarely asks for seconds (be it any kind of food, including desserts!) but she wanted an additional piece of the icecream cake!
Swiss roll ice cream cake
inspired by the recipe of the same name from the Taste of Home website)
Swiss rolls - Recipe
Preparation time- 10 minutes
Baking time- 10-12 minutes
Rolling and cooling time- at least 30 minutes
Filling-5-8 minutes
Filling and rolling- 5-10 minutes
Ingredients-
6 medium sized eggs
1 C / 225 gms caster sugar /8 oz+ extra for rolling
6 tblsp / 45gms/ a pinch over 1.5 oz of all purpose (plain) flour + 5 tblsp/40gm /a pinch under 1.5 oz of natural unsweetened cocoa powder, sifted together
2 tblsp /30ml / 1 fl oz of boiling water
a little oil for brushing the pans
For the filling-
2C / 500 mls/ 16 fl oz of whipping cream
1 vanilla pod, cut into small pieces of about ½ cm (or 1 tsp vanilla extract)
5 tblsp / 70gms/2.5oz of caster sugar
Method-
1. Pre heat the oven at 200 deg C /400 deg F approximately. Brush the baking pans ( 11 inches by 9 inches ) with a little oil and line with greaseproof baking paper. If you have just one pan, bake one cake and then let the pan cool completely before using it for the next cake.
2. In a large mixing bowl, add the eggs and sugar and beat till very thick; when the beaters are lifted, it should leave a trail on the surface for at least 10 seconds.
3. Add the flour mixture, in three batches and fold in gently with a spatula. Fold in the water.
5. Place a pan in the centre of the pre heated oven and bake for about 10-12 minutes or till the centre is springy to the touch.
6. Spread a kitchen towel on the counter and sprinkle a little caster sugar over it.
7. Turn the cake on to the towel and peel away the baking paper. Trim any crisp edges.
8. Starting from one of the shorter sides, start to make a roll with the towel going inside. Cool the wrapped roll on a rack, seam side down.
9. Repeat the same for the next cake as well.
10. Grind together the vanilla pieces and sugar in a food processer till nicely mixed together. If you are using vanilla extract, just grind the sugar on its own and then add the sugar and extract to the cream.
11. In a large bowl, add the cream and vanilla-sugar mixture and beat till very thick.
12. Divide the cream mixture between the completely cooled cakes.
13. Open the rolls and spread the cream mixture, making sure it does not go right to the edges (a border of ½ an inch should be fine).
14. Roll the cakes up again, this time without the towel. Wrap in plastic wrap and chill in the fridge till needed, seam side down.

Vanilla ice cream
Preparation time-5 minutes+freezing
Ingredients-
2 and ½ C / 625 ml / 20 fl oz of whipping cream
1 vanilla bean, minced or 1 tsp/ 5 ml/ .15 fl oz vanilla extract
½ C / 115gms/ 4 oz of granulated sugar
Method-
1. Grind together the sugar and vanilla in a food processor. In a mixing bowl, add the cream and vanilla –sugar mixture and whisk lightly till everything is mixed together. If you are using the vanilla extract, grind the sugar on its own and then and the sugar along with the vanilla extract to the cream.
2. Pour into a freezer friendly container and freeze till firm around the edges. Remove from the freezer, beat till smooth and return to the freezer. Do this 3-4 times and then set completely.
Hot fudge sauce
Preparation time-2 minutes
Cooking time-2 minutes
Ingredients-
1 C / 230gms/ 8 oz of caster sugar
3 tblsp / 24gms/1.5 oz of natural unsweetened cocoa powder
2 tblsp /15gms/ 1 oz of cornflour/cornstarch
1 and ½ C /355ml /12 fl oz of water
1 tblsp /14gms/ 1 oz butter
1 tsp/5 ml / .15 fl oz vanilla extract
Method-
1. In a small saucepan, whisk together the sugar, cocoa powder, cornflour and water.
2. Place the pan over heat, and stir constantly, till it begins to thicken and is smooth (for about 2 minutes).
3. Remove from heat and mix in the butter and vanilla. Keep aside to cool .
Chocolate ice cream
Preparation time- 5 minutes + freezing
Ingredients-
2C/ 500 ml whipping cream
1 C/230gms/8 oz caster sugar
3 tblsp/ 24 gms/1.5 oz of natural unsweetened cocoa powder
Method-
1. Grind together the sugar and the cocoa powder in a food processor .
2. In a saucepan, add all the ingredients and whisk lightly.
3. Place the pan over heat and keep stirring till it begins to bubble around the edges.
4. Remove from heat and cool completely before transferring to a freezer friendly container till firm around the edges. If you are using an ice cream maker, churn the ice cream according to the manufacturer’s instruction, after the mixture has cooled completely.
5. Remove from the freezer, beat till smooth and return to the freezer. Do this 3-4 times and then set completely.

Assembly
1. Cut the Swiss rolls into 20 equal slices ( approximately 2 cms each ).
2. Cover the bottom and sides of the bowl in which you are going to set the dessert with cling film/plastic wrap.
3. Arrange two slices at the bottom of the pan, with their seam sides facing each other. Arrange the Swiss roll slices up the bowl, with the seam sides facing away from the bottom, to cover the sides of the bowl. Cover the bowl with plastic wrap and freeze till the slices are firm (at least 30 minutes).
4. Soften the vanilla ice cream. Take the bowl out of the freezer, remove the cling film cover and add the ice cream on top of the cake slices. Spread it out to cover the bottom and sides of the bowl. Cover the bowl with plastic wrap and freeze till firm ( at least 1 hour).
5. Add the fudge sauce over the vanilla ice cream, cover and freeze till firm . ( at least an hour).
6. Soften the chocolate ice cream and spread it over the fudge sauce. Cover with plastic wrap and freeze for at least 4-5 hours till completely set .
7. Remove the plastic cover, and place the serving plate on top of the bowl. Turn it upside down and remove the bowl and the plastic lining. If the bowl does not come away easily, wipe the outsides of the bowl with a kitchen towel dampened with hot water. The bowl will come away easily.
8. Keep the cake out of the freezer for at least 10 minutes before slicing, depending on how hot your region is. Slice with a sharp knife, dipped in hot water.
June 6, 2010
Croquembouche or Piece Montee for Daring Baker's Challenge

First of all, let me apologize to all my readers for posting late for May 2010 Daring Baker's challenge. We decided to take a vacation without much advance planning and so I was away on my vacation!! I totally forgot about preparing the post eventhough I completed the challenge well ahead of time this month! Thanks, Twinsy Rachel for your message of support! :-) I really appreciate it!
For the Vanilla Crème Patissiere (Half Batch)
1 cup (225 ml.) whole milk
2 Tbsp. cornstarch
6 Tbsp. (100 g.) sugar
1 large egg
2 large egg yolks
2 Tbsp. (30 g.) unsalted butter
1 Tsp. Vanilla
Dissolve cornstarch in ¼ cup of milk. Combine the remaining milk with the sugar in a saucepan; bring to boil; remove from heat.
Beat the whole egg, then the yolks into the cornstarch mixture. Pour 1/3 of boiling milk into the egg mixture, whisking constantly so that the eggs do not begin to cook.
Return the remaining milk to boil. Pour in the hot egg mixture in a stream, continuing whisking.
Continue whisking (this is important – you do not want the eggs to solidify/cook) until the cream thickens and comes to a boil. Remove from heat and beat in the butter and vanilla.
Pour cream into a stainless steel/ceramic bowl. Press plastic wrap firmly against the surface. Chill immediately and until ready to use.
For Chocolate Pastry Cream (Half Batch Recipe):
Bring ¼ cup (about 50 cl.) milk to a boil in a small pan; remove from heat and add in 3 ounces (about 80 g.) semisweet chocolate, finely chopped, and mix until smooth. Whisk into pastry cream when you add the butter and vanilla.
For Coffee Pastry Cream (Half Batch recipe)
Dissolve 1 ½ teaspoons instant espresso powder in 1 ½ teaspoons boiling water. Whisk into pastry cream with butter and vanilla.
Pate a Choux (Yield: About 28)
¾ cup (175 ml.) water
6 Tbsp. (85 g.) unsalted butter
¼ Tsp. salt
1 Tbsp. sugar
1 cup (125 g.) all-purpose flour
4 large eggs
For Egg Wash: 1 egg and pinch of salt
Pre-heat oven to 425◦F/220◦C degrees. Line two baking sheets with parchment paper.
Preparing batter:
Combine water, butter, salt and sugar in a saucepan over medium heat. Bring to a boil and stir occasionally. At boil, remove from heat and sift in the flour, stirring to combine completely.
Return to heat and cook, stirring constantly until the batter dries slightly and begins to pull away from the sides of the pan.
Transfer to a bowl and stir with a wooden spoon 1 minute to cool slightly.
Add 1 egg. The batter will appear loose and shiny.
As you stir, the batter will become dry-looking like lightly buttered mashed potatoes.
It is at this point that you will add in the next egg. Repeat until you have incorporated all the eggs.

Piping:
Transfer batter to a pastry bag fitted with a large open tip (I piped directly from the bag opening without a tip). Pipe choux about 1 inch-part in the baking sheets. Choux should be about 1 inch high about 1 inch wide.
Using a clean finger dipped in hot water, gently press down on any tips that have formed on the top of choux when piping. You want them to retain their ball shape, but be smoothly curved on top.
Brush tops with egg wash (1 egg lightly beaten with pinch of salt).
Baking:
Bake the choux at 425◦F/220◦C degrees until well-puffed and turning lightly golden in color, about 10 minutes.
Lower the temperature to 350◦F/180◦C degrees and continue baking until well-colored and dry, about 20 minutes more. Remove to a rack and cool.
Can be stored in a airtight box overnight.
Filling:
When you are ready to assemble your piece montée, using a plain pastry tip, pierce the bottom of each choux. Fill the choux with pastry cream using either the same tip or a star tip, and place on a paper-lined sheet. Choux can be refrigerated briefly at this point while you make your glaze.
Use one of these to top your choux and assemble your piece montée.
Chocolate Glaze:
8 ounces/200 g. finely chopped chocolate (use the finest quality you can afford as the taste will be quite pronounced; I recommend semi-sweet)
Melt chocolate in microwave or double boiler. Stir at regular intervals to avoid burning. Use the best quality chocolate you can afford. Use immediately.
Hard Caramel Glaze:
1 cup (225 g.) sugar
½ teaspoon lemon juice
Combine sugar and lemon juice in a saucepan with a metal kitchen spoon stirring until the sugar resembles wet sand. Place on medium heat; heat without stirring until sugar starts to melt around the sides of the pan and the center begins to smoke. Begin to stir sugar. Continue heating, stirring occasionally until the sugar is a clear, amber color. Remove from heat immediately; place bottom of pan in ice water to stop the cooking. Use immediately.

You may want to lay out your unfilled, unglazed choux in a practice design to get a feel for how to assemble the final dessert. For example, if making a conical shape, trace a circle (no bigger than 8 inches) on a piece of parchment to use as a pattern. Then take some of the larger choux and assemble them in the circle for the bottom layer. Practice seeing which pieces fit together best.
Once you are ready to assemble your piece montée, dip the top of each choux in your glaze (careful it may be still hot!), and start assembling on your cake board/plate/sheet. Continue dipping and adding choux in levels using the glaze to hold them together as you build up. (You may want to use toothpicks to hold them in place – see video #4 below).
When you have finished the design of your piece montée, you may drizzle with remaining glaze or use ribbons, sugar cookie cut-outs, almonds, flowers, etc. to decorate. Have fun and enjoy! Bon appétit!

August 27, 2009
Dobos Torte - A Hungarian treat!

The preparation of buttercream went well, but I felt that the buttercream was a bit too thin (liquid-y). I refrigerated the buttercream for quite a bit before spreading. The circles were stacked on top of each other with a layer of buttercream icing in between. Because the buttercream was so soft it was tough holding the stacks together. I put the cake stacks in the freezer for a while. Once they were manageable, I put a toothpick through the center to hold the layers together.
The cake was frozen most of the time before it was eaten. I could really make the buttercream smooth and beautiful while decorating but I decided to put a ribbon around the cake just for presentation purposes. One of the stacks were done with a ribbon around it, and the other was done with two thin strips of ribbons.I wanted the caramel coated cake piece to be stiff so that it would stand up on top of the cake. Instead of the caramel covered cake wedges, I cut out a piece of cake from the rectangle cake made from the excess batter and coated in caramel. The caramel was made by heating sugar with a bit of water until the melted sugar turned dark brown. The caramel was poured on top of the cake cut-out and allowed to harden.
The cakes were decorated with the caramel cake cut-out, chocolate pipings, chopped and whole hazelnuts and chopped almonds.
VERDICT:
We really enjoyed the Dobos torte, it was amazing!! They were actually fun to assemble, except for the fact that the buttercream was a little too soft. But it was sooooo delicious. This is the first time that I made buttercream icing with eggs. The flavors went well together especially the buttercream and the hazelnut combo. JM mentioned that he wouldve loved a bit of chopped hazelnuts between each cake layer. The whole thing was so delicious, our individual cakes disappeared in a couple of minutes. My only suggestion would be to moisten the cake layers with a flavored syrup/juice before stacking, as I found them a little chewy and dry. But all in all, the textures and the flavors went extremely well together especially the toasted hazelnuts with the buttercream icing. One more amazing challenge that I am happy about!!
I had some buttercream icing left over which LM really enjoyed the nest day as an awesome bread-spread, yes a spread for bread!! Actually I enjoyed the sandwich just as much as lil LM.

Equipment
- 2 baking sheets
- 9” (23cm) springform tin and 8” cake tin, for templates
- mixing bowls (1 medium, 1 large)
- a sieve
- a double boiler (a large saucepan plus a large heat-proof mixing bowl which fits snugly over the top of the pan)
- a small saucepan
- a whisk (you could use a balloon whisk for the entire cake, but an electric hand whisk or stand mixer will make life much easier)
- metal offset spatula
- sharp knife
- a 7 1/2” cardboard cake round, or just build cake on the base of a sprinfrom tin.
- piping bag and tip, optional
Prep times
- Sponge layers 20 mins prep, 40 mins cooking total if baking each layer individually.
- Buttercream: 20 mins cooking. Cooling time for buttercream: about 1 hour plus 10 minutes after this to beat and divide.
- Caramel layer: 10-15 minutes.
- Assembly of whole cake: 20 minutes
Sponge cake layers
- 6 large eggs, separated, at room temperature
- 1 1/3 cups (162g) confectioner's (icing) sugar, divided
- 1 teaspoon (5ml) vanilla extract
- 1 cup plus 2 tablespoons (112g) sifted cake flour (SUBSTITUTE 95g plain flour + 17g cornflour (cornstarch) sifted together)
- pinch of salt
Chocolate Buttercream
- 4 large eggs, at room temperature
- 1 cup (200g) caster (ultrafine or superfine white) sugar
- 4oz (110g) bakers chocolate or your favourite dark chocolate, finely chopped
- 2 sticks plus 2 tablespoons (250g) unsalted butter, at room temperature.
Caramel topping
- 1 cup (200g) caster (superfine or ultrafine white) sugar
- 12 tablespoons (180 ml) water
- 8 teaspoons (40 ml) lemon juice
- 1 tablespoon neutral oil (e.g. grapeseed, rice bran, sunflower)
Finishing touches
- a 7” cardboard round
- 12 whole hazelnuts, peeled and toasted
- ½ cup (50g) peeled and finely chopped hazelnuts

Directions for the sponge layers:
NB. The sponge layers can be prepared in advance and stored interleaved with parchment and well-wrapped in the fridge overnight.
1.Position the racks in the top and centre thirds of the oven and heat to 400F (200C).
2.Cut six pieces of parchment paper to fit the baking sheets. Using the bottom of a 9" (23cm) springform tin as a template and a dark pencil or a pen, trace a circle on each of the papers, and turn them over (the circle should be visible from the other side, so that the graphite or ink doesn't touch the cake batter.)
3.Beat the egg yolks, 2/3 cup (81g) of the confectioner's (icing) sugar, and the vanilla in a medium bowl with a mixer on high speed until the mixture is thick, pale yellow and forms a thick ribbon when the beaters are lifted a few inches above the batter, about 3 minutes. (You can do this step with a balloon whisk if you don't have a mixer.)
4.In another bowl, using clean beaters, beat the egg whites until soft peaks form. Gradually beat in the remaining 2/3 cup (81g) of confectioner's (icing) sugar until the whites form stiff, shiny peaks. Using a large rubber spatula, stir about 1/4 of the beaten whites into the egg yolk mixture, then fold in the remainder, leaving a few wisps of white visible. Combine the flour and salt. Sift half the flour over the eggs, and fold in; repeat with the remaining flour.
5.Line one of the baking sheets with a circle-marked paper. Using a small offset spatula, spread about 3/4 cup of the batter in an even layer, filling in the traced circle on one baking sheet. Bake on the top rack for 5 minutes, until the cake springs back when pressed gently in the centre and the edges are lightly browned. While this cake bakes, repeat the process on the other baking sheet, placing it on the centre rack. When the first cake is done, move the second cake to the top rack. Invert the first cake onto a flat surface and carefully peel off the paper. Slide the cake layer back onto the paper and let stand until cool. Rinse the baking sheet under cold running water to cool, and dry it before lining with another parchment. Continue with the remaining papers and batter to make a total of six layers. Completely cool the layers. Using an 8" springform pan bottom or plate as a template, trim each cake layer into a neat round. (A small serrated knife is best for this task.)

Directions for the chocolate buttercream:
NB. This can be prepared in advance and kept chilled until required.
1.Prepare a double-boiler: quarter-fill a large saucepan with water and bring it to a boil.
2.Meanwhile, whisk the eggs with the sugar until pale and thickened, about five minutes. You can use a balloon whisk or electric hand mixer for this.
3.Fit bowl over the boiling water in the saucepan (water should not touch bowl) and lower the heat to a brisk simmer. Cook the egg mixture, whisking constantly, for 2-3 minutes until you see it starting to thicken a bit. Whisk in the finely chopped chocolate and cook, stirring, for a further 2-3 minutes.
4.Scrape the chocolate mixture into a medium bowl and leave to cool to room temperature. It should be quite thick and sticky in consistency.
5.When cool, beat in the soft butter, a small piece (about 2 tablespoons/30g) at a time. An electric hand mixer is great here, but it is possible to beat the butter in with a spatula if it is soft enough. You should end up with a thick, velvety chocolate buttercream. Chill while you make the caramel topping.
Lorraine's note: If you're in Winter just now your butter might not soften enough at room temperature, which leads to lumps forming in the buttercream. Male sure the butter is of a very soft texture I.e. running a knife through it will provide little resistance, before you try to beat it into the chocolate mixture. Also, if you beat the butter in while the chocolate mixture is hot you'll end up with more of a ganache than a buttercream!
Directions for the caramel topping:
1.Choose the best-looking cake layer for the caramel top. To make the caramel topping: Line a jellyroll pan with parchment paper and butter the paper. Place the reserved cake layer on the paper. Score the cake into 12 equal wedges. Lightly oil a thin, sharp knife and an offset metal spatula.
2.Stir the sugar, water and lemon juice in a small saucepan. Bring to a boil over a medium heat, stirring often to dissolve the sugar. Once dissolved into a smooth syrup, turn the heat up to high and boil without stirring, swirling the pan by the handle occasionally and washing down any sugar crystals on the sides of the pan with a wet brush until the syrup has turned into an amber-coloured caramel.
3.The top layer is perhaps the hardest part of the whole cake so make sure you have a oiled, hot offset spatula ready. I also find it helps if the cake layer hasn't just been taken out of the refrigerator. I made mine ahead of time and the cake layer was cold and the toffee set very, very quickly—too quickly for me to spread it. Immediately pour all of the hot caramel over the cake layer. You will have some leftover most probably but more is better than less and you can always make nice toffee pattern using the extra to decorate. Using the offset spatula, quickly spread the caramel evenly to the edge of the cake layer. Let cool until beginning to set, about 30 seconds. Using the tip of the hot oiled knife (keep re-oiling this with a pastry brush between cutting), cut through the scored marks to divide the caramel layer into 12 equal wedges. Cool another minute or so, then use the edge of the knife to completely cut and separate the wedges using one firm slice movement (rather than rocking back and forth which may produce toffee strands). Cool completely.
Angela's note: I recommend cutting, rather than scoring, the cake layer into wedges before covering in caramel (reform them into a round). If you have an 8” silicon round form, then I highly recommend placing the wedges in that for easy removal later and it also ensures that the caramel stays on the cake layer. Once set, use a very sharp knife to separate the wedges.
Assembling the Dobos
1.Divide the buttercream into six equal parts.
2.Place a dab of chocolate buttercream on the middle of a 7 1/2” cardboard round and top with one cake layer. Spread the layer with one part of the chocolate icing. Repeat with 4 more cake layers. Spread the remaining icing on the sides of the cake.
3.Optional: press the finely chopped hazelnuts onto the sides of the cake.
4.Propping a hazelnut under each wedge so that it sits at an angle, arrange the wedges on top of the cake in a spoke pattern. If you have any leftover buttercream, you can pipe rosettes under each hazelnut or a large rosette in the centre of the cake. Refrigerate the cake under a cake dome until the icing is set, about 2 hours. Let slices come to room temperature for the best possible flavour.
Storage
I (Angela) am quite happy to store this cake at room temperature under a glass dome, but your mileage may vary. If you do decide to chill it, then I would advise also using a glass dome if you have done. I should also note that the cake will cut more cleanly when chilled.

Variations
Shape: The traditional shape of a Dobos Torta is a circular cake, but you can vary the shape and size if you want. Sherry Yard in Desserts By The Yard makes a skyscraper Dobos by cutting a full-size cake into four wedges and stacking them to create a tall, sail-shaped cake. Mini Dobos would be very cute, and you could perch a little disc of caramel on top.
Flavour: While we both love the dark chocolate buttercream and this is traditional, we think it would be fun to see what fun buttercreams you all come up with! So, go wild! Or, you could brush each layer with a flavoured syrup if you just want a hint of a second flavour. Cointreau syrup would be divine!
Nuts: These are optional for decoration, so no worries if you're allergic to them. If you don't like hazelnuts, then substitute for another variety that you like.
Egg concerns
The cooking process for the buttercream will produce lightly cooked eggs. If you fall into a vulnerable health group then you may wish to use an egg-less buttercream.
Hope you all liked my version of Dobos torte. If you would like to see how I did in my previous DB challenges, click here. Please do take a moment to go through some of the fellow DB members blogs.
Thank you for visiting me today. Have a great day!!